
One of my favorite ways to describe what I do to my kids’ friends is to say that I get to read books for a living. Audiobook narration lets me read books in some of my favorite genres and meet (or catch up with) dynamic characters with engaging backstories. Of course, reading for fun and narrating an audiobook are two completely different things. Narrating an audiobook uses some of the same tactics that I use when I’m reading for pleasure, but there’s so much more than just opening the file, grabbing a cup of coffee, and getting lost in the story.
I should note that my setup is entirely Windows-based. Mac users often use iPads and iAnnotate in their narration process to mark up their text. If you’re curious about that workflow and how you can use those tools, head over to Narrators Roadmap for tips and instructional videos.
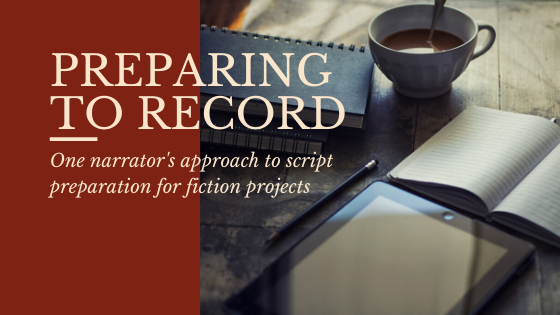
Step One: The First Read and File Prep
I ask that my authors and publishers send me the text as a PDF. This helps me in two ways. First, I have a clean copy that I can send to my engineer and proofer upon completion of the project. Second, I have a file format that I can mark up in Adobe Acrobat. I save a copy of the script with -MARKUP added the end to differentiate between my script and the clean copy.
Then, I start reading. This is the somewhat relaxed first pass, where I get to snag a cup of coffee and read the story, meet the characters, and get into the plot. On this first pass, I insert bookmarks for each chapter or section. This helps me navigate through the file without having to do endless scrolling.
During this first read, I also mark any unfamiliar words, names, or languages that I’ll have to pronounce so that I can look them up later. Adobe Acrobat lets me make a note that I can modify later with pronunciation notes and links
Another note: I read quickly. When people ask how quickly I read, I tell them that I read Harry Potter and the Deathly Hallows in just under three hours. If you sit next to me and I’m reading fiction, it looks like I’m skimming with how quickly I’m flipping the pages. Some people might not be able to afford time for multiple read-throughs. My nerdy superpower gives me a slight edge, and I’ll take it.
Step Two: The Second Read and Character Highlights
The second read is the longest stage of my script prep, especially when a book has a large cast of characters. I go back to the beginning and highlight each character with their own color. Certain types of voices get specific colors, so that I can switch between characters and deliveries as I read. For series, the main characters have their specific colors that don’t change from book to book. Certain types of characters/voices always have the same color scheme, regardless of the book title or genre.
Let’s use my main series, The Empire of Bones Saga by Terry Mixon, as an example. I’ll be prepping the twelfth book in this series in the second quarter of the year, so some of these characters may be making an appearance.
Jared Mertz (255, 191, 0) – #ffbf00
Kelsey Bandar (244, 170, 191) – #f4aabf
Carl Owlet (0, 255, 0) – #00ff00
Elise Orison – Elise Orison (255, 128, 192) – #ff80c0
Talbot – Talbot (255, 128, 0) – #ff8000
Clarice Beauchamp – Clarice Beauchamp (255, 255, 170) – #ffffaa
My main male voices are usually in some shade of orange or gold, while main female voices are some shade of pink or purple. Secondary male characters are in shades of blue (with certain colors assigned for specific temperaments or deliveries) or green (especially when they’re character voices that have a defining accent or quirk). Secondary female characters tend toward peach and yellow tones. Any character that only shows up once, such as a bit line for a guard or random crewmember, gets a shade of grey. Multiple bit lines are done in lighter and darker shades of grey, with notes next to them.
Highlighting a script takes me several hours, and I wind up doing a much more thorough read-through on this second pass. The prep work pays off when I finally start recording. I recognize the voices that I need as I read the chapter, and the color cues let me switch delivery, tone, and accent with relative ease.
Step Three: The Spreadsheet
Once the script is marked and highlighted, I open up Google Drive and save a copy of my Script Prep template with the name of the current book. There are two sheets in this workbook. The first is for planning my recording days and tracking my progress, and the second is for characters per chapter.
In the first sheet, I enter in the chapters and their starting page numbers from the script. Formulas fill in the pages per chapter. There’s a column for actual recording time and a column for estimated recording time. Using the first chapter to drive the rest of the forumulas, I get an estimate of how long each chapter will be and what the final total runtime of the book will be. This helps when I’m figuring out how much I can record in a morning session or afternoon session, since my day still gets broken up by momtaxi duties during the school year.
In the second sheet, I list each chapter as a column, then list all of the characters who show up in that particular chapter. This step helps me know if I have to recheck a particular accent or delivery, or if I’m going to be switching between a lot of characters during the chapter. Some accents don’t switch easily for me (say, American Deep South and New Zealand, as I learned during Terry Mixon’s Tree of Liberty) and some accents require practice beforehand (German, which slides into Russian if I don’t focus). This character/voice double-check has also helped my authors, as I’ve caught more than one continuity error this way.
Step Four: Record
With two read-throughs, a marked script, and my spreadsheet, I’m ready to go. As I record each chapter, I enter the actual time for each file and the spreadsheet recalculates the estimated time for the remaining chapters. I still read the chapters for the day before I start recording to make sure that I’m prepared for what’s going to happen.
I use this method for any book that I record these days. A little bit of preparation makes the actual time in the booth much more pleasant!